For my first engineering update, I want to talk about a new project I recently started: building a laser measuring device.
The initial motivation for this project was to begin familiarizing myself with the TF-Luna Lidar Sensor. I’ve always found lidar technology to be super fascinating, especially for applications relating to autonomous vehicles. To keep things simple, I decided to first create a basic laser measuring device.
The first thing I had to figure out was how I wanted to display the distance data and what extra features I wanted to add. I decided to include a visible laser (using the KY-008 module) for aiming, an LCD (1602 module) to show the readings, and two buttons—one for powering the device and another for pausing the measurement to lock a specific distance.
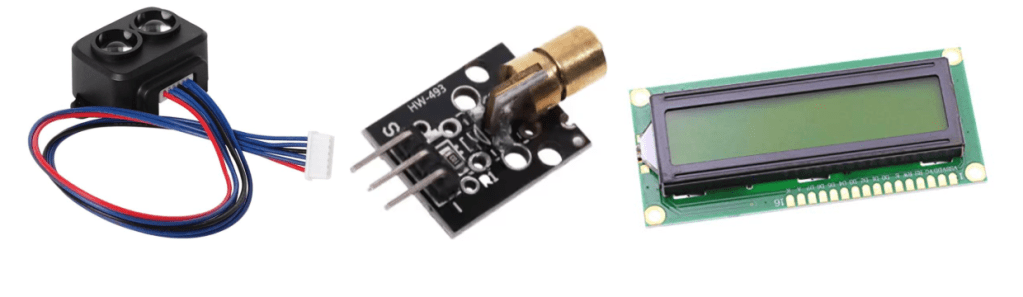
Images of the TF – Luna, KY-008, and LCD1602
Once I settled on the functions and parts I needed, I moved on to assembling the circuit. Since it was my first time using both the TF-Luna and the LCD screen, I looked up their pinouts to make sure I connected everything properly. The LCD (parallel version) has 16 pins, which include connections for power, contrast adjustment, data transfer, and control. The TF-Luna has 6 pins, mainly for power, ground, and communication (like TX, RX, and I2C lines).
After wiring everything up, I started testing each component one by one.
Throughout all of my education, I’ve always been told to break large tasks into smaller ones to avoid unnecessary complications. Growing up, I didn’t think much of that advice—but now, in engineering, I’m able to really understand its importance. Taking things step-by-step really does make building and troubleshooting much easier.
On that note, I started by testing the LCD screen. After playing around with the LiquidCrystal library, I got a better understanding of how to control it. Next, I moved onto the TF-Luna. I downloaded the TFLI2C library, ran a few example codes, and made sure I could read distance measurements through the serial monitor. Once that was working, I updated my code to display the distance directly on the LCD instead. Finally, I connected the laser module and added the code to get the laser beam working.
At this point, I haven’t added the buttons yet, but that’s the next thing on my list. So far, everything has been going pretty smoothly, with only minor hiccups here and there. I’m hoping it stays that way, but if any big challenges come up, I’ll definitely document them. Until next time!


Leave a reply to Mariza Mancera Cancel reply